Banff National Park: 5 Days In The Canadian Rockies
- Alexis Haviters

- Jul 24, 2020
- 11 min read
Updated: May 5, 2025

Banff National Park is located in the southwest region of Canada in the province of Alberta. This heavenly landscape has coined the name ‘The Canadian Rockies’ for a good reason. A thrill-seekers dream come true, Banff National Park offers all sorts of activities to get your blood pumping. During our stay, we went rocky mountain climbing, mountain biking, raged at a festival, and obviously hiked…a lot!
Flight + Lodging
Calgary International Airport it is your closest bet with 1 hour and 25 min from the park. Needless to say, renting a car is essential for this trip to happen as you will need it the entire time cruising from trailhead to trailhead. Your first step should be to book your sleeping accommodation. Summer is the peak season and many places book up very fast and whatever is left is overpriced for its value.

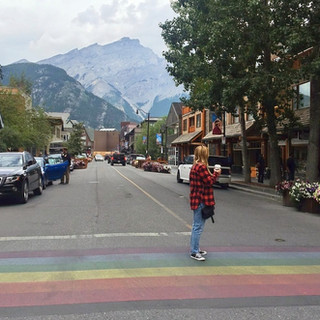
So here's the million-dollar question...Where should you stay? Most people contemplate staying in either downtown Banff or Canmore. If you stay in downtown Banff you're inside the park in a lovely town. This is where all the fun happens; plenty of stores for shopping, gear, rentals, bars, restaurants etc. However, with crowded tourism, comes limited parking and high prices so let it be known.
Footnote: if you have days to spare, you should totally road trip to the surrounding national parks, like Jasper.
Getting a National Park Pass

Getting a pass to enter the national park is quite easy! All we did was drive up to the booth at the park entrance and purchased a weekly pass. Banff is HUGE and driving to some trailheads can take hours. We spent a lot of time driving, but it wasn't so bad since the views are jaw dropping.
What to Pack On Every Hike
-Bear spray / can't bring this on the plane
-Bug spray, bug spray, bug spray!
-Lightweight layers
-Charging bank
-Lot’s of water / I used my Camelback
-Lunch, snacks, and extra snacks
-Hiking boots + merino wool socks
-Packable first aid kit
-Utility knife / for basic protection and needs
-Hammock / bring it to Moraine Lake
-Lightweight rain jacket
-Packable coat + beanie / gets cold at high elevation
Itinerary
I recommend planning your hikes and highlights in advance to optimize your time there and to always let someone know what trail you are hiking and a time frame for when you are expecting to return.
Day 1 / Johnson Canyon Trail

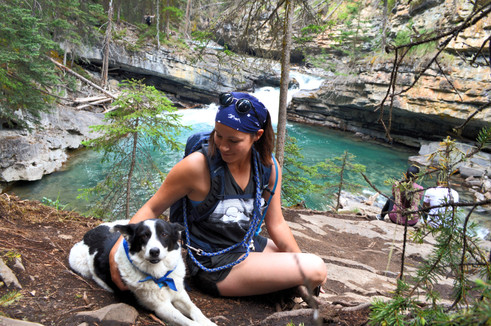
Take advantage of the long hours of daylight here in the summertime. Since the sun doesn't set till 9:40 pm in July you have plenty of time to get day 1 going! After we checked in, went food shopping, and prepared lunch for the next day we headed over to Johnson Canyon Trail. This easy, nearby trail is only 35 min away from Canmore, with spectacular views, an endless amount of scenic waterfalls, dog friendly (on leash), and is handicap accessible! I would give yourself 2-3 hours or more depending on if you like to wander off the trail, chill by the falls, and take your time photographing. This will be the hike that has the MOST waterfalls you’ll see.


This easy hike is perfect for photographers with gear so don't question it, just do it! I recommend a pair of comfortable sneakers with good traction or a pair of hiking sandals, like Teva if you plan on climbing down to the rushing river to get a closer look. I brought my life straw for fun and while drinking I fell into the river haha! Fortunately, my best friend dragged me out but we were laughing so hard throughout every second of it which made it even harder to get me out LOL!
Day 2 / Moraine Lake + Sentinel Pass Trail


This is the ultimate hammock spot! Wake up super early, like 4 am at the latest, and hit the road for your first full day in Banff! 2 hours cruising on the highway will land you at Moraine Lake. I recommend arriving by 6 am at the latest to get a parking spot and enjoy the turquoise lake without the crowd. We got there around that time and the parking lot was nearly full. If you have a camper, this parking lot has special accommodations. Moraine Lake is only a 5 minute walk from the parking lot so TOTALLY whip out your hammock, enjoy your coffee, breakfast, and chill. Once you’re all done you can easily drop your things off in the car, gear up, and begin your trek on Sentinel Pass Trail! This 4 hour hike is rated hard and gets you sweating almost right away with steep, never-ending, switchbacks. Just keep going, you’ll get to flatlands, see wildflowers, mountain peaks, and meet friends on a steady trail before you know it! Heads up! This area of the trail has a lot of mosquitos and bugs.

Some parts of this trek were chilly and others were hot. I would pack a beanie, a lightweight jacket, and layers to keep you going through those moments.
Random Footnote: Don’t bother visiting the hot springs nearby, it costs money, super crowded, and isn’t appealing at all. It appeared as a town pool. The second we saw it, we left.
Days 3/ Rested, Fueled Up, and Partied


This day was much needed after a nonstop on-the-go lifestyle. We chilled out for the day, ran some errands, and at night went to this sick rave! This day was so much fun! Right before heading into the music festival, we wanted to get a bite to eat so we went to Big Al's Bar and Grill in Calgary. We had a BLAST people watching, dancing, warming up with a beer and bar food, and jamming out to live country music! The guy at the end of the video made my day, enjoy!
When we arrived at the music festival we were greeted by a long line that went back for at least half a mile! After driving 2 hours to get there, we were not into waiting in line. Talisa somehow pulled some crazy moves and got us to cut the entire line!!!! Once we got in, we met up with some friends and RAVED!! As if it couldn't have gotten any better, Talisa and I snuck into VIP where we enjoyed the rest of the night!
Day 4/ Mountain Biking + Rocky Mtn. Climbing


We rented our mountain bikes through Canmore Nordic Centre and would totally do it all over again! The prices were reasonable, staff was helpful, attentive, and prepared our gear, plus the trails were close by which eliminates that extra step of transporting the bikes in the car! Be aware of bears- Most people don't realize that bear chases are common with bikers because they're quick and quiet which startles the bear.
Talisa and I enjoyed this very much but we decided to split up and meet up at the rental. After going around some trails on my own, I was on the road heading back when I hit a rock and flipped over on some gravel. I was left laughing by myself looking crazy with bloody elbows, arms, and knees desperately wishing Talisa were with me for this one LOL. To top it off I was lost, had no service, and seeing other bikers for directions was near and far. When I finally made it back, I made quite the hilarious appearance and had to go clean off rocks embedded in my skin and dirt on my shoulder haha!

After I cleaned up we wasted no time before we were on our way to the next adventure- Rock climbing! We made arrangements on Airbnb experiences but you can also organized a tour through Explore Share to take you to Sunshine Rock, a perfect spot for beginners- intermediate climbers. Sunshine Rock is an easy to get to, popular spot, and close to town, which is best for squeezing in a quick climb. We had a great time climbing here, but if you are looking for that wow factor and amazing views, I would suggest looking elsewhere instead, like Lake Louise.
Day 5/ Mt. Yamnuska AKA Best Day of My Life

On this day we checked out of our hotel in Canmore and wanted to do a “quick hike” before we hit the road to go to Calgary, where we’ll stay overnight and catch an early flight in the A.M. Since this hike is located outside of Banff Nat'l Park, but on our way to Calgary, we figured it’ll fit perfectly into our plan. Oh boy, were we right about that!
We park the car, strap on our boots, geared up with the basics, and went on our merry way. About 300 feet into the trail we saw a park ranger warning hikers of the dangers ahead and educating the experienced folks on how to properly move through the tricky terrain. Let's get some things straight here...I have trekked quite a bit on this planet and I have NEVER been warned by a park ranger of how dangerous a hike was about to be. In summary, we learned that 80% of rescue missions in Canada happen right here on this specific trail, the only way out is via a helicopter, a film featuring Leonardo DiCaprio called, 'The Revenant' took place here (cool-right?), and fatalities do happen here but they're not typical. In fact the week before a fellow hiker wasn't so lucky and didn't make it out alive. Some dangerous wildlife on this trail you should be aware of are mountain lions and Brown bears which are frequently spotted so definitely bring a knife and bear spray.
While this might deter others, this all in fact excited Talisa and I even more in a scary good way because we're crazy lol. Before we took another step forward we made sure we had all the proper gear on us and took a picture of a poster board showcasing the translation of arm signals just in case we need to communicate with a helicopter (I recommend you do the same).

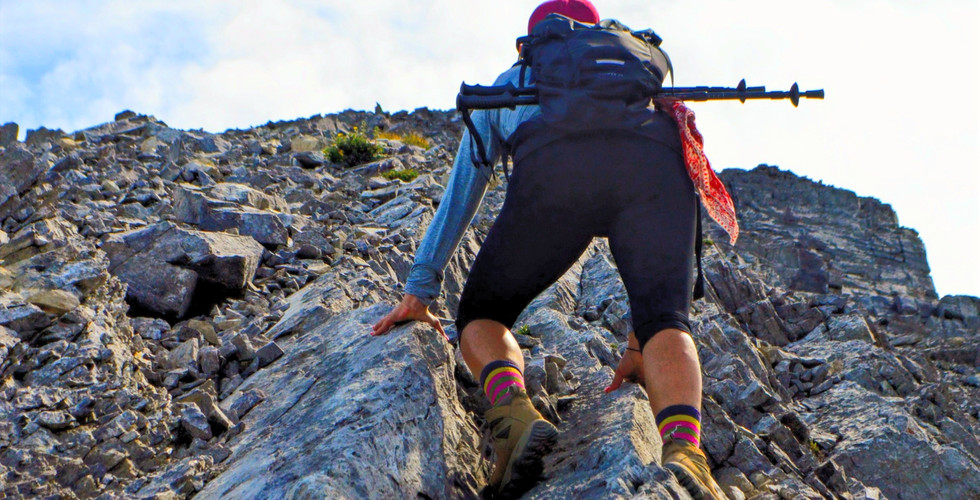
Now let's get down to business: Mount Yamnuska is a 6.5 mile loop trail (follow the blue markings) that is intended for experienced hikers only. It can also be done as an in and out trail if you want to avoid the scree. We did the loop and the scree was our favorite part. This terrain requires individuals who are confident in their abilities and are comfortable with navigation. Dog's are permitted on a leash however, I would not recommend it. We did a good chunk of the hike with a dog and there were moments I questioned it. This dog, Ringo, was a trooper and thankfully made it out safely. Mt. Yamnuska has a very diverse trail from woodsy, shady cool areas, to dry hot dusty feels in the hot sun and intense scrambles.
Come prepared with a downloaded map, extra portable charger, knife, bear spray (note this cannot be brought on the plane), bug spray, full stomach, first aid kit, collapsible hiking poles, food, snacks, a good water supply, and the proper footwear, including the proper socks. Get specifically merino wool socks, it’s important.


The beginning of the trail is lovely, woodsy, steep in some parts, and in shade. Once you move out of that area the trail markings are less obvious so be sure to consistently check the map once you exit the forest area. We got a little off track here. After that small part, the blue trail markings are easy to follow and clearly marked. You’ll spot them on tree trunks, rocks, walls, etc.
You'll begin to notice tight areas to squeeze by and a scramble creeping on. This would be a good time to secure cameras, hiking poles, and another that will distract you from being able to successfully move through the scramble.


After moving along the trail for a decent amount of time, you’ll come across a cliff face with chains. This is the moment you will scale the cliff face. The ledge is about 6 inches and some wider areas are 10 inches with a few hundred-foot drop. Some hikers use helmets and strap into a harness, but we just held onto the chain and we did not feel in danger crossing. It was sturdy, well put together and the ledge was wide enough to get half your foot on. If you have a dog (don't recommend bringing them), try and find another way by going over it.

As you continue to move along, you’ll feel yourself getting closer and closer to the summit. This is the part where you should secure your belongings, like your camera, poles, and water bottle. You’ll know you’re almost there when it's getting steeper and your scramble feels more like a climb. You'll definitely need all 4 limbs and make sure your camera is not on your neck, it'll certainly dangle and get scratched up on rocks.
Once you've arrived at the summit you'll see fellow trekkers having lunch, relaxing, or prepping for the next stride, and you should do the same. 30 minutes is a sufficient break, have fun but don't get too comfortable, you must scurry along for the challenging technical sections while you have your momentum.


Descending down Mount Yamnuska requires the right kind of footwork. You'll notice the narrow dirt path amongst all the loose rock, and that's when the fun really started for us. Acting like complete hilarious idiots we all were sliding all over the place with style. Some of us falling in a giant movement of rocks, while others were pros and heading straight down with their mountain bike with absolutely no chill. We were laughing throughout it all and had really good spirits about the whole thing. After falling and accepting the fact having rocks inside our boots was our fate, we found that shuffling sideways down the mountain worked for the meantime. This terrain was particularly tricky and we had no idea what we were doing. There were millions of small to medium sized very loose rocks that coated the entire face. It was nearly impossible to stand still, the rocks moved beneath your feet and you just continue to move with them. The greater the momentum, the greater the movement. So once you started to take your steps forward, the rocks would dramatically move beneath your feet, carrying you down with them. This descends on such loose rocky particles is called scree. When you type 'scree' into google images, this trail appears straight away. That's how iconic and wild this scree is.


Pay attention: This is where a bulk of rescue missions occur and we were about to find out why. Once we made it through that part, we passed through a small pocket of trees, as you move through them make sure you stay to the LEFT. The gap between trail markers increases and it is easy to miss it and go straight down passing over another scree, which leads you to a cliff that is not clear to see from a distance. If you go down that way, there is no way out. It is impossible to climb back up, you have absolutely no phone service, and no shade/shelter. To add on, it is nearly impossible for other hikers to spot you down there. Your only hope for rescue is via a helicopter ride.


Once you phase out of the trees and follow the trail to the left, you'll see a long narrow path hugging a cliff face. At the end of that trail is where the fun gets dialed up a bit. Get ready- another scree is ahead and it's way more intense than the one before. The main trick here is to keep your heels dug in and back. I like to have my legs a little further apart and run on the side of my heel to side. My laughter was echoing throughout the mountains once I got the hang of it. I felt like a child the way I was just laughing uncontrollably in the mountains where I belong.
You'll sadly reach the bottom of this long scree eventually where you explore into the next phase of your trek and last one. A beautiful forest awaits you and it's pretty cool too. But first- you gotta dump all the rocks out of your boots. In no time you'll enjoy crossing streams, stepping over large root systems, and being shaded by the trees. This last stretch will last you about an hour or two and you'll feel bittersweet seeing your car in the lot.


link link link link link link link link link link link link link link link link link link link link link link link link link link link link link link link link link link link link link link link link link link link link link link link link link link link link link link link link link link link link link link link link link link link link link link link link link link link link link link link link link link link link link link link link link link link link link link link link link link link link link link link link link link link link link link link link link link